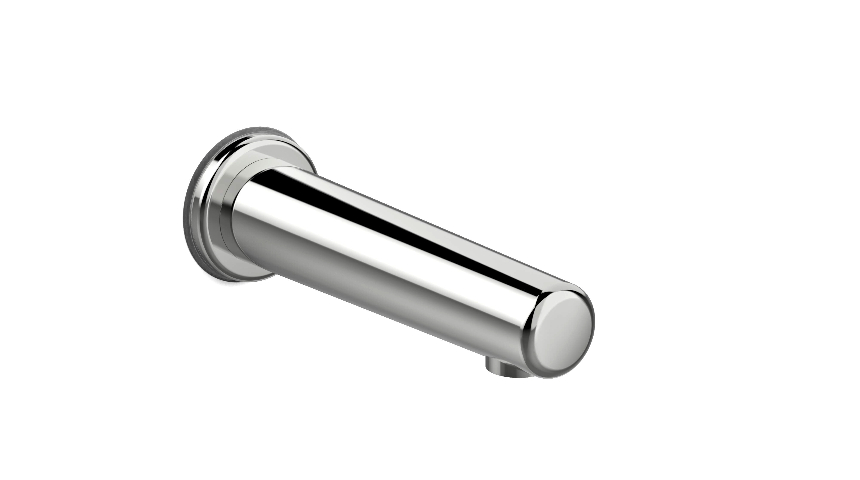
Touchless spout faucets are a common picture in public restrooms, such as airports and malls but also medical buildings. They are not only easy to operate, but also easy to install. In fact, it only takes a few quick steps. Here’s all you need to know about installing touchless spout faucets.
Smarter faucets and advanced technology demand more and more from professionals. And with more exciting benefits, such as touchless features, also come more parameters that installers need to look out for. Luckily, installing new-generation faucets is as easy as installing a traditional manual faucet.
The intuitive plug-and-play system keeps the number of individual parts and tools to a minimum to make installation and maintenance as easy as possible for the installer.
To ensure a quick and trouble-free process, make sure you keep the following in mind.
What you need to know before installation
All spout faucets are designed to integrate the technology in the spout’s body. That includes water outlet, sensors, and electronics (including batteries and the magnetic valve, that’s necessary to switch the water flow on and off).
That also means that the faucet’s dimensions are fixed and can’t be shortened, so make sure you choose the right model. You can choose between two faucet sizes, which are based on the dimensions of common washbasins:
- Models with a 175mm length (measured from the wall to the spout’s outlet)
- Models with a 225mm length (measured from the wall to the spout’s outlet)
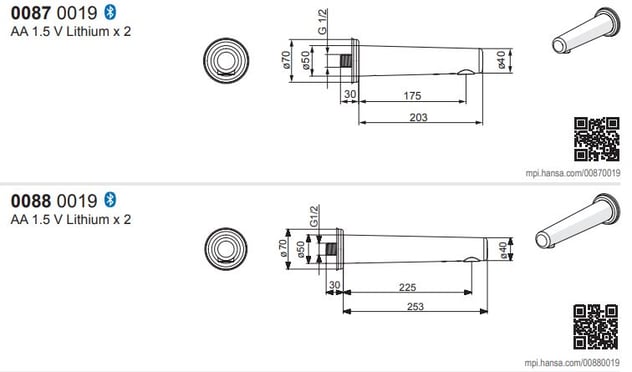
Installing a touchless spout faucet in 3 easy steps
Step 1:
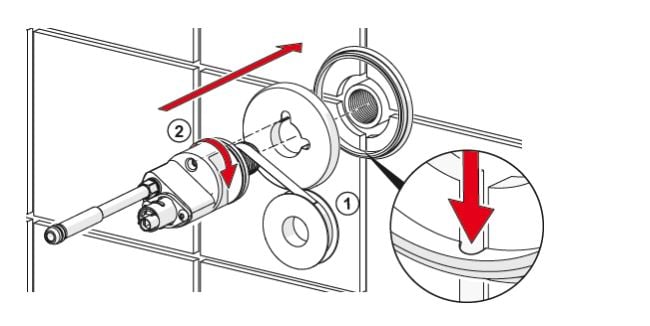
- Place the silicone seal on the installation hole and add the cover plate
- Seal the fitting body with a Teflon tape to create a tight connection between the internal and external thread
NOTE: In the silicone seal, there’s a recess that prevents water that may originate from leaks to collect in the inner body of the faucet. Make sure that the recess is facing down to allow drainage.
Step 2:
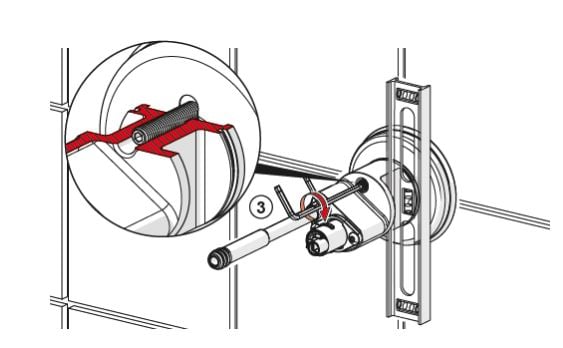
Screw the inner body on the thread and align with a spirit level. All models come with an indentation so that you can position the spirit level without complications.
Step 3:
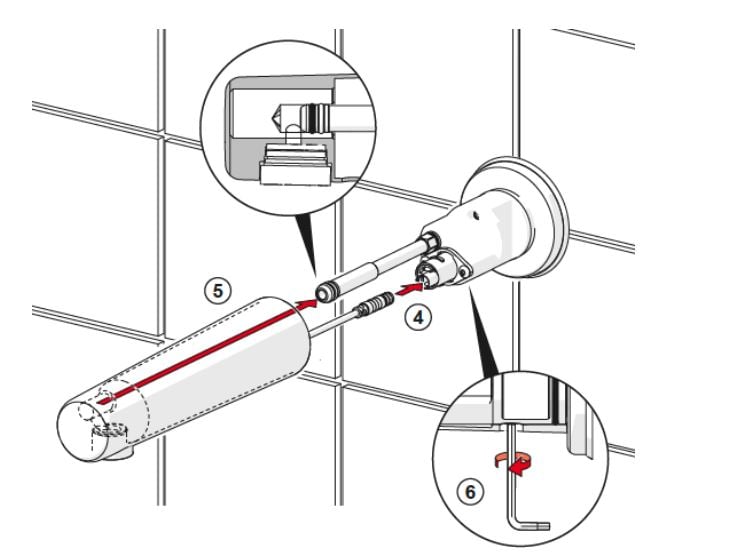
- Push the front part of the spout onto the protruding inner body and establish the electrical connection. Guide the sealing rings neatly into the recess of the sealing body so that the water pipe meets the water outlet.
- Secure the outlet so that it cannot be pulled off towards the front.
- Once the plug connection is established, the sensor receives a signal that it’s connected to the solenoid valve and can start working.
Good to know
If maintenance work (e.g. battery replacement) is necessary, an integrated shut-off valve can be used. That means that building operators or installers don’t need to shut off the entire water supply of the building to carry out maintenance work.
NOTE: If you need to change the batteries, make sure to use lithium batteries to ensure long service life.
After installation
As the faucet comes with a Bluetooth-connected sensor, installers can make use of the HANSA app to adjust the parameters of the valve, such as afterflow time, or schedule automatic flushing intervals if a fitting has not been used for a certain period of time, to maintain water hygiene and flush stagnant water out of the pipes.
Touchless spout faucets can be easily integrated into any environment if you pay attention to a few important details. That’s why, to guarantee a seamless and quick installation, always make sure that the recess is properly positioned, the inner body is aligned with the spirit level and that the electrical and mechanical connection is established.


